Quick Start: HW Cheat Sheet
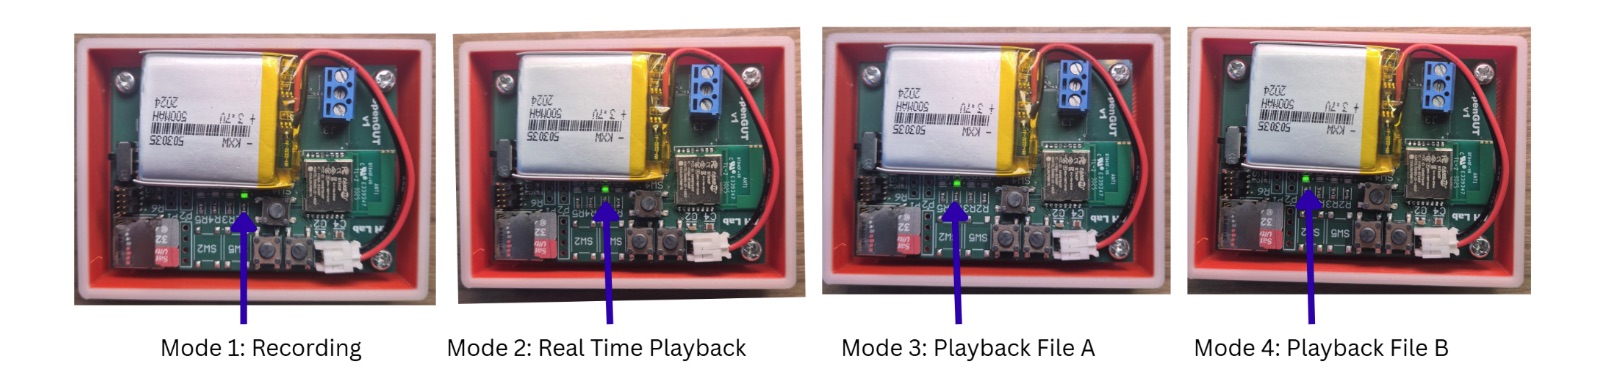
Mode Indicators
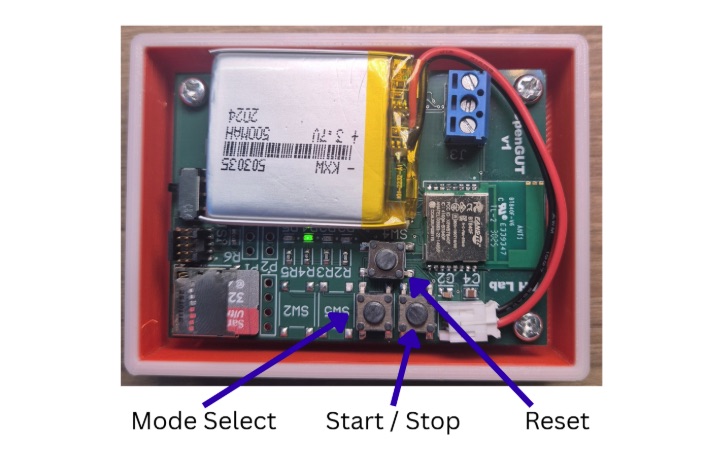
Control Buttons
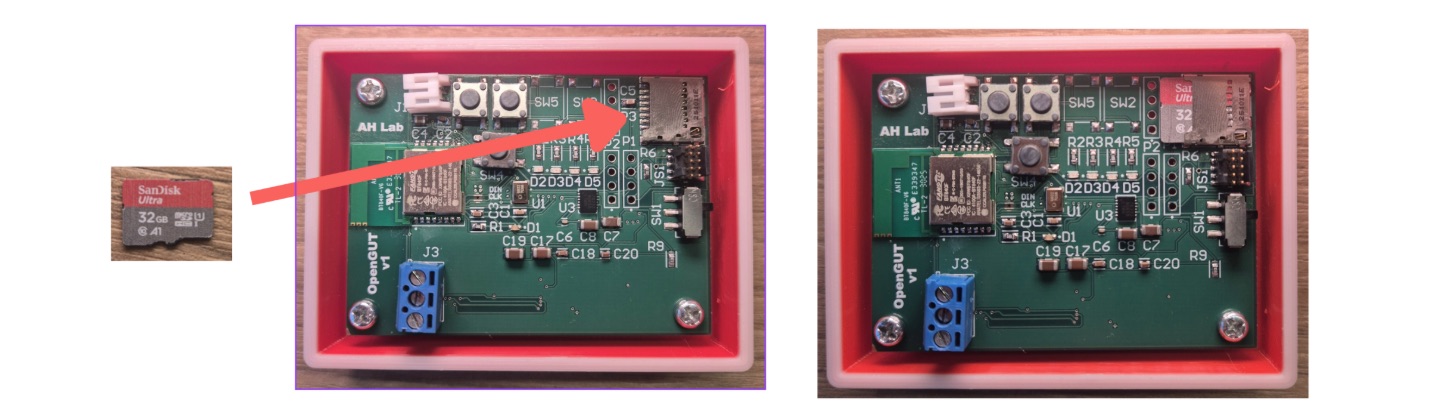
microSD Card Slot
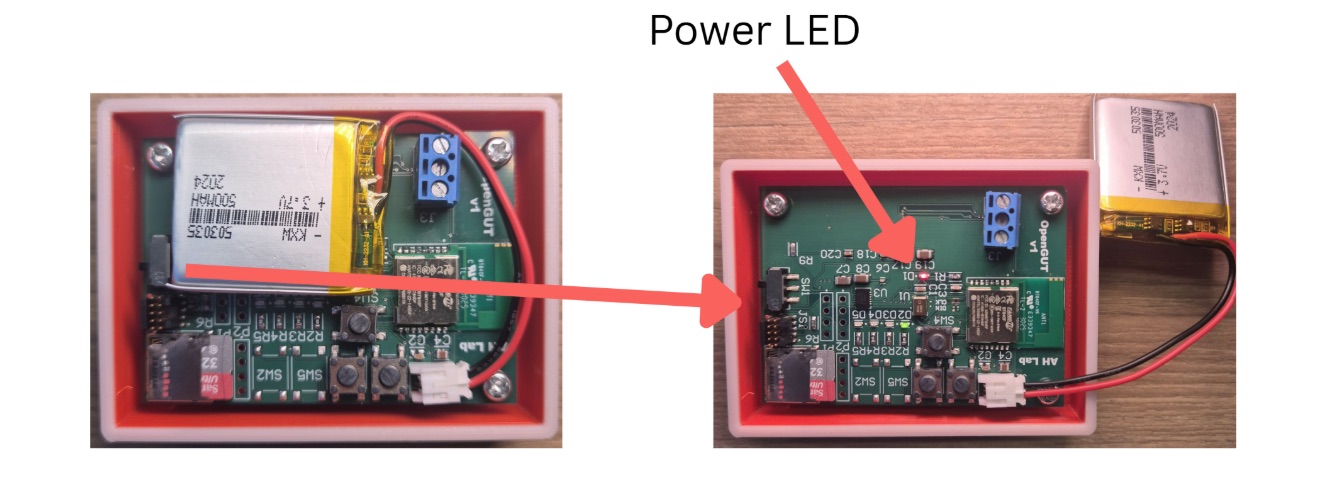
Power Indicator
Actuator Connector
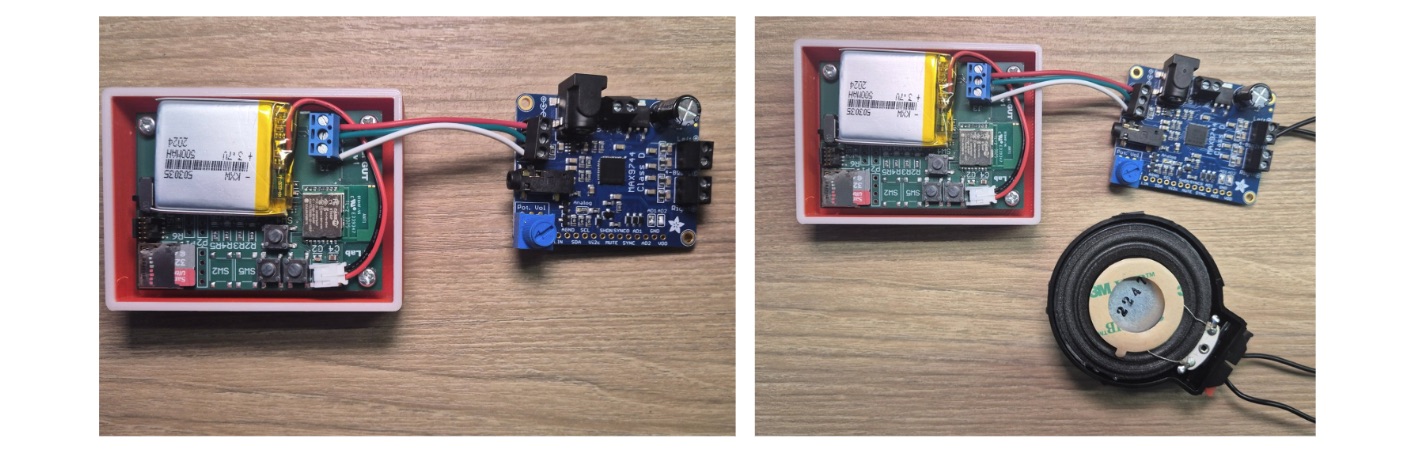
Quick Start: Logger Mode
- Insert a microSD card to OpenGUT hardware.
- Turn on OpenGUT hardware by using the on-board toggle switch.
- Toggle mode to logger mode by using the mode selection switch.
- Press the run button to start recording.
- Place module in wearing belt, with a stethoscope placed in between the stomach and the hardware.
- When recording is complete, click the run switch to stop current recording.
- Turn OpenGUT hardware off by using the on-board toggle switch.
- Remove the microSD card from the hardware.
Quick Start: Playback Mode
- Load a microSD card on a computer.
- Specify wave file(s) you want to play using the OpenGUT software (up to two files can be supported) and download the wave files to the microSD card.
- Remove the microSD card from the computer and insert it to the OpenGUT hardware.
- Turn OpenGUT hardware on by using the on-board toggle switch.
- Click the mode selection button to select either file A or B to playback.
- Place the hardware in a wearing belt, along with an actuator device optionally, and wear the belt.
- Once ready, press the run button to begin playback.
Quick Start: Loopback Mode
- This mode does not require a microSD card.
- Turn OpenGUT hardware on by using the on-board toggle switch.
- Once the hardware has been placed in the belt and worn, click the mode selection button (could be multiple times) to set it to Mode 2.
- Click the run button to start the loopback session.
- Click the run button again to stop the loopback session.
- For real-time audio visualization and recording on the computer, connect the on-board sound output to a headphone amplifier or an audio amplifier (i.e. Scarlett Solo) to link the audio output to your computer. Sound processing software, such as Audacity or AudioMass, for visualization and recording.
- For real-time haptic feedback to the stomach, source the on-board sound output to a suitable amplifier, such as Adafruit MAX9744 breakout board or similar, to connect the transducer. This allows for experimentation with different types of transducers for feedback.